Installation Guide
Setting up your Twister Compressor can be straightforward if you follow these simplified steps. Here's an overview of what to expect when installing your compressor. Note that each model has distinct installation differences that will be discussed in more detail within the manual.
1. Preparation
Create a Template:
Use cardboard to trace the base size and mount hole locations of the compressor. This will help you drill accurate holes for mounting.
Check for Space:
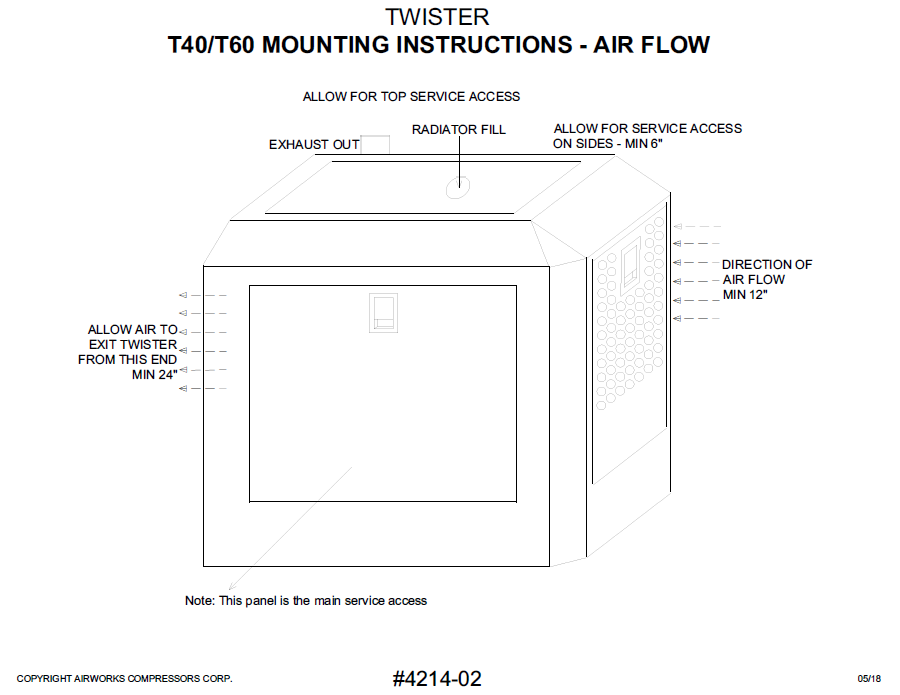
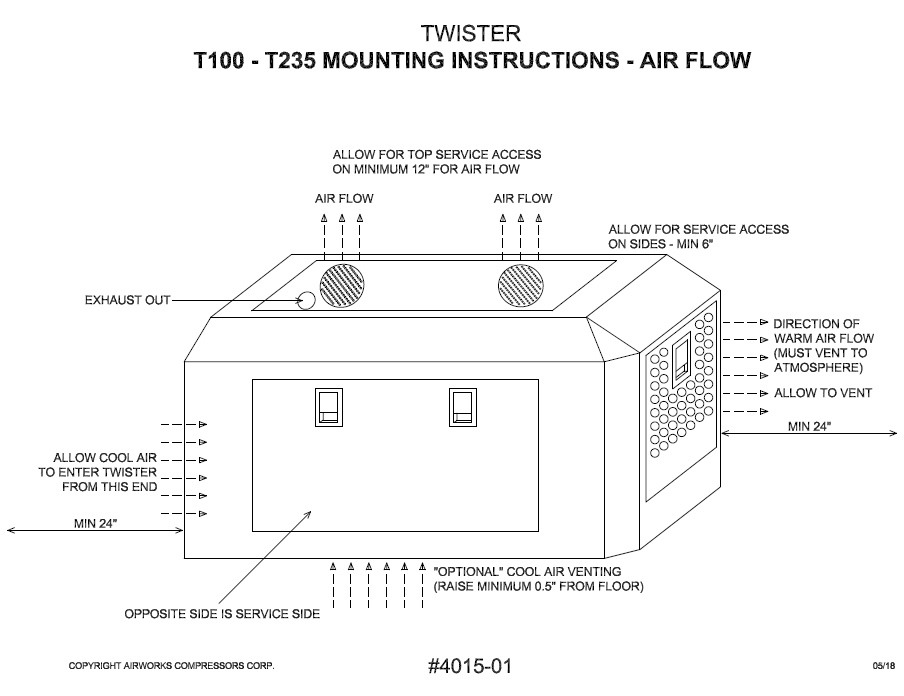
Ensure there's enough room for fitting, hose/wire routing, ventilation, and easy service access. Be mindful of obstacles beneath the surface when drilling. At some point, your compressor will require servicing


2. Mounting the Compressor
Secure the Compressor:
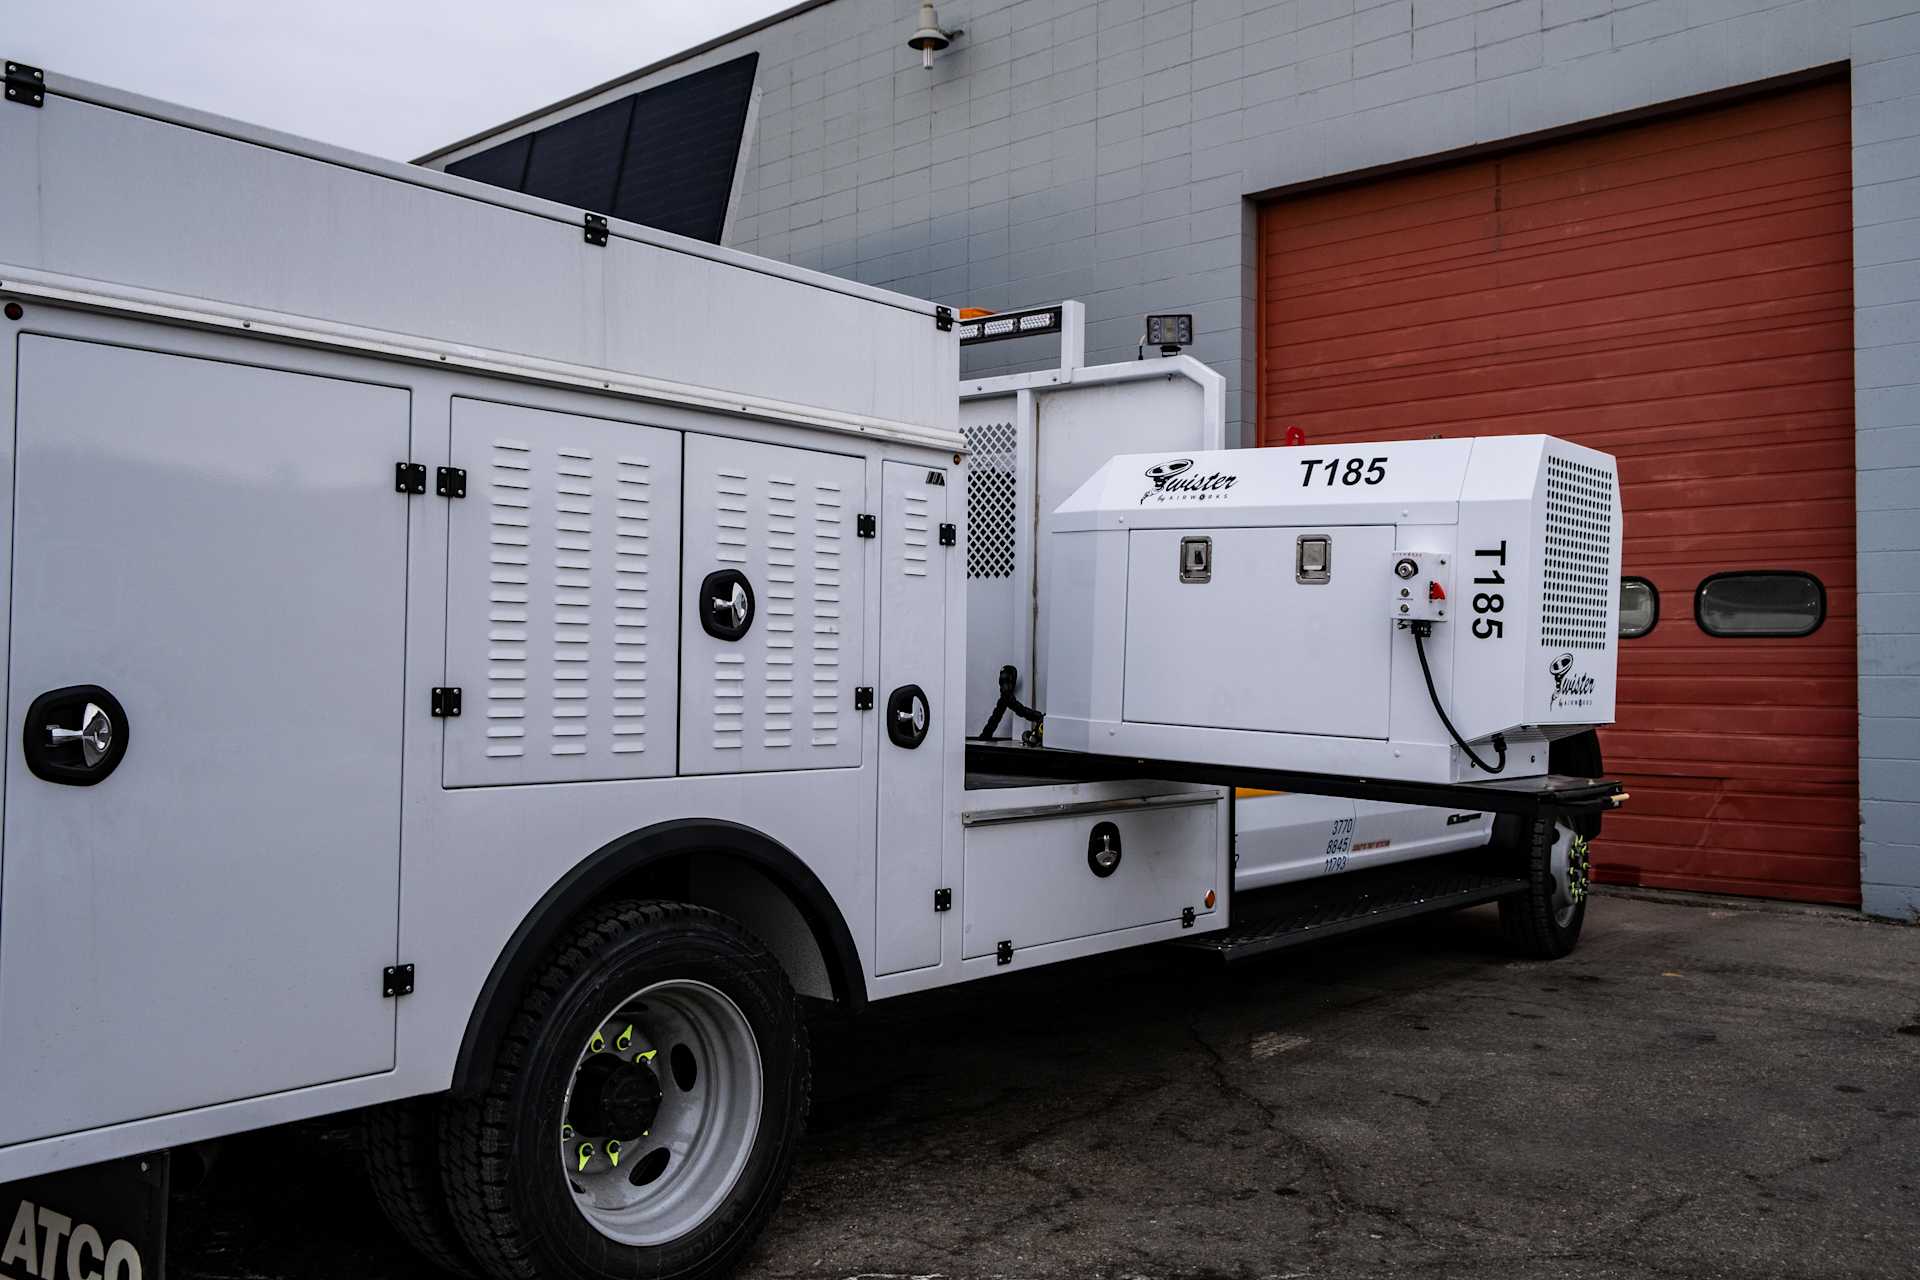
Fasten the compressor to the service body using the provided holes and locking fasteners.
Control Panel Placement:
Mount the Twister control panel in an accessible spot. Use an extension (Part Number AOCBH10) if needed.
3. Fuel Line Installation (For Vehicle-Mounted Applications)
Run Fuel Lines:
Connect supply and return fuel lines to your vehicle's fuel tank using the auxiliary pickup provisions. Avoid cutting into the truck engine lines and consult the vehicle manufacturer for proper procedures. Use the kit (Part Number ATA013) for this step.
Prevent Issues:
Ensure fuel lines don’t rub or pinch when the vehicle moves and avoid hot or moving parts. For long runs or high lifts, consider an auxiliary fuel pump (Part Number AOF003).
4. Battery Connection
Use Proper Cables:
Connect the battery cables to the Twister using a minimum of 4-gauge welding wire with a 150-amp breaker. Ground the unit using the supplied ground lead.
Protect the Cable:
Run the battery cable from the Twister quick connector (#27) to the truck battery, with a 150-amp circuit breaker near the battery. Ensure the cable is protected from damage and use fine strand welding cable for the best results.
5. Air Line Restrictions
Minimize Fittings:
Limit the use of 45-degree and 90-degree fittings to three or fewer to maintain airflow. Use at least 3/4" hose/plumbing throughout the system.
6. Airflow Considerations
Ensure Proper Airflow:
If the Twister is installed in a confined space, make sure there’s proper airflow direction. Provide fresh air intake and a vent for warm air exit. Ensure hot air doesn’t get redirected into the cooling stream.
7. Cooling System
Use the Right Package:
Connect the truck cooling system to the Twister using Airworks’ Cold Weather Package (Part Number ATO112) to avoid voiding the warranty.
Maintain Coolant Levels:
Operating with low coolant can cause damage not covered by the warranty. Use only Airworks coolant (Part Number ATE123).
Additional Tips
Electric Fuel Pump:
If the installation is more than 6 feet from the fuel tank, relocate the pump closer or use an auxiliary pump (Part Number ATO110).
Avoid Air Line Restrictions:
Prevent using more than three direction changes or elbows to maintain airflow. Ensure fittings are the same size or larger than the Twister air outlet.
Battery Cable Length:
For installations over 12 feet from the battery, use a heavier cable.
Looking for more?
Do you have more questions or concerns about installing your Twister? Don't hesitate to get in touch with one of our trained technicians today, either by emailing info@airworkscompressors.com, or by navigating to the contact form on our website.
